
Connecting with a Place

Text here lah-dee-dah, change photo of monarchs in hands to something else.
Jump to:
Active Bodies, active minds

Joy in the great outdoors! Madison Audubon photo
1. Nature Walk
Nature walks are a great way to get outside. You could “walk” in your backyard, around your neighborhood, or in a larger natural area. You don’t need any special gear, but binoculars, magnifying glasses, nature journals, or scavenger hunts can make it exciting.
You can take your cues from the kids during the hike (are they interested in solo exploration, or do they keep running back to you with questions?) or set your own intention. Below are some ideas to get you started.
Nature Walk Ideas:
Let kids explore solo or stick together in a family group.
Set an intention: silent observational hike, look for phenology (signs of seasons changing), focus on something like birds, mammals, tracks, or other signs of animals.
Walk and wait for teachable moments to present themselves.
Compare and contrast several nature walk locations: backyard vs. neighborhood vs. natural area. If you have several natural areas, compare different habitat types.
Pair this with topics you’re working on in other lessons/school-at-home, use nature walks to bring that learning outside.
Pair with nature journals, scavenger hunts, sit spots or add a game into the middle of your nature walk.
Created by Coyote’s Guide to Connecting with Nature, with adaptations from Madison Audubon

These tired hikers are taking a break. Don’t worry, their smiles returned after a short rest. Madison Audubon photo
2. Solo Hike
Give kids a safe space to be alone in nature. Determine the route you will have kids travel. A well-cleared, easily visible path works best, and a loop trail is ideal. Teach kids how to pass other people on the trail while maintaining 6 feet of physical distancing. If kids are not mature enough to do this on their own, an adult should stick close to them.
If you like, place quotes, pictures, or cartoons about nature along the path. Small marker flags (with metal stems) is useful if it will be windy. You can also tie them to vegetation. Be sure to count the number of items you set out, so that you can be sure to collect them all when you’re done!
Send kids down the trail one at a time, and space them out a minute or so apart. Instruct kids to pause behind the person in front of them, always giving space so that kids aren’t walking together. Kids should stop at each quote/picture and spend a moment reading and thinking about it. They can also pause and look at anything that interests them.
Adjust your plan based on the maturity of your kids. Send an adult first, send kids in pairs, or plan this in an open space where all kids will be visible at once. Create a firm plan for where kids will go when they are done and what they will do once they get there. Telling kids this plan before you start will make for a quiet, calm ending to the activity.
Lesson passed to Madison Audubon by Emily Meier, with adaptations from Madison Audubon
3. Sensory Inventory
Have everyone in the group stand in a circle outside. Ask kids to close their eyes, then lead them through each sense and what it is telling us. Ask: What are your ears telling you? What can you smell? Taste? Feel? Ask kids what they know about the day based on their senses (is it windy, raining, sunny?) Save sight for last.
Created by James Neill with adaptations from Madison Audubon
Put on your blindfold and join us on a Sensory Hike! Madison Audubon photo
4. Sensory Hike
Take the Sensory Inventory one step farther and do a Sensory Hike! You’ll need a blindfold (a t-shirt or hat pulled over their eyes will work in a pinch), earplugs (or safety earmuffs), and a natural space.
Have the people in your group pair up. Talk with kids about how important our senses of sight and hearing are, and what we rely on them for. One person in each pair should put on a blindfold. The person with the blindfold should explore the area, paying careful attention to how the experience is different from when they can use their eyes. The person without the blindfold will make sure the blindfolded person stays safe! Warn them about things they could trip on or bump into. After a few minutes, trade roles! Do the same with the earplugs.
At the end of the activity, ask kids what they thought of the experience. Does it make them think about people who are differently abled, and how they experience the world? You can bring the blindfolds inside too, and let kids explore their senses there!

This youngin exclaimed, “It takes TWO hugs to get all the way around this tree!” Madison Audubon photo
5. Meet a Tree
For this activity, you’ll need a natural space with some trees in it and a blindfold. Ideally, there would be several different types of trees. You could also do this in a backyard and use other plants instead - just don’t tell kids to hug them unless they’re hardy!
Begin by showing kids two different kinds of hugs you can give a tree: vertical (with feet together and legs straight, lean your body against the tree and hug it), koala (wrap your arms and legs around the tree hugging tightly. You can sit on the ground, or hold your body off of the ground), etc. Help kids think up other ways to hug trees, and practice.
Kids pair up, either with each other or with an adult. One person is blindfolded. The unblindfolded partner spins the other gently in place to disorient them. Then this partner leads the blindfolded one to a tree. The blindfolded kid touches, smells, and gets to know their tree. Don’t forget to hug it! They can also listen for nearby sounds that might help them identify the tree later. Their partner then leads them back to start and removes their blindfold. Now it is time for the person who had the blindfold on to find their tree again! Their partner is not allowed to give them verbal hints but can tell them when they have found it. Then partners swap so everyone gets a turn in each role.
Quiet and Outside

Sit Spots
Sit spots are a great way to teach kids how to sit and observe nature. They can be done anywhere: it’s best to be outside, but you could do this while looking out of your favorite window. To maximize usefulness of the sit-spot experience, follow these steps.
1. Have the kids spread out in the natural area you’re in. Set boundaries for where they’re allowed to go if the space is large! Tell kids that they should choose a space where they feel connected with nature. They should be able to sit comfortably there for a few minutes. Bring a plastic bag or a piece of tarp if it is muddy.
2. Tell kids that we’ll be sitting in their spot for 2, 5, or 10 minutes, depending on their age. You can adjust during the sit spot if you need to.
3. Before you start, set an intention for the sit spot. You could have kids just sit and soak it all in. They could try to remember all of the natural or human-made sounds they hear. They could count bird songs or look for insects. Choose whatever you think will get them excited about their spot.
4. Give kids a decisive start time, and update them when they’re half way through and when there’s 30 seconds left. This will help them make it to the end of the sit spot. You might also decide to pair this with a nature journal. Kids could write in their journal during the sit spot or after the time has passed.
5. When the sit spot time is up, everyone should share their experiences. Be excited, so that the kids will catch your enthusiasm. Discuss what the kids observed and how they felt. Was it easy or hard to sit still for so long? Were they comfortable? Would they pick the same spot again next time, or change to a new one?
Building ritual:
Sit spots are an amazing tool for building nature routine into your life. You could return to the same spot each time, or pick a new one. You could do this daily, weekly, or whenever you happen to be outside.
Created by Coyote’s Guide to Connecting with Nature, with adaptations from Madison Audubon
Hands-on Activity

Queen Ann’s lace is soft and feathery - perfect for Mystery Box. Madison Audubon photo
Mystery Box
Gather nature items the next time you’re out on a hike. Pick items of various shapes, sizes, and textures. Rocks, pinecones, leaves, pine needles, moss, and sticks are all great choices. Back at home, cut hand-sized holes into a shoe box. A cloth bag with a drawstring will also work well.
Have kids close their eyes while you pick one item to put into the box. Then, have kids take turns putting a hand in and feeling the object. When everyone has had a feel, ask if anyone thinks they know what it is. Reveal the item before switching it out, or keep it a secret until the end.
Originally Get in Touch with Nature by Peace Corps, with adaptations from Madison Audubon
Creative
Nature Journals for Kids
Nature journals are a wonderful way to connect with your surroundings. They help you to pause, observe, and really immerse yourself in the world around you. Most importantly, they give you space to breathe deep and focus on something peaceful. There are SO many ways to journal about nature, and no way to fail. However you choose to sit and observe, you’re going to benefit. Write paragraphs or poetry, make lists, draw, label, or write questions. Just explore nature and record your journey.

This child is so excited to be spending time outside. Nature journaling helps make writing and observation practice FUN! Madison Audubon photo
Supplies:
You can start with just a few sheets of computer paper, a pencil, and a surface to work on. You could also create your own sketchbook (check out YouTube for book binding tutorials!) or grab an old notebook. Whatever you have on hand will work. Some people like working only in pencil, while others use ink, colored pencils, markers, or watercolor. Choose materials that make you happy.
Nature inspiration:
Take a walk around your backyard, neighborhood, or local park to look for natural objects (pine cones, acorns, leaves, flowers). Remember, it’s ok to be outside as long as you’re practicing physical distancing. We recommend taking pictures of things that are still growing rather than collecting them.
You can also find inspiration while inside your home. Sit at a window and look for wildlife: squirrels, chipmunks, rabbits, crows, hawks, and many other bird species are all living in our neighborhoods too! If a window isn’t exciting enough, you can always draw from a video: nest cameras or feeder cameras offer great views of living, moving birds.
Resources for educators/parents:
Free PDF: Nature Journaling for Kids!
Free PDF of John Muir Law’s How to Teach Nature Journaling: How To Teach Nature Journaling
Field Journaling with Students packet by Beetles: Follow this link to check it out!
Nature Journaling for Older Kids & Adults
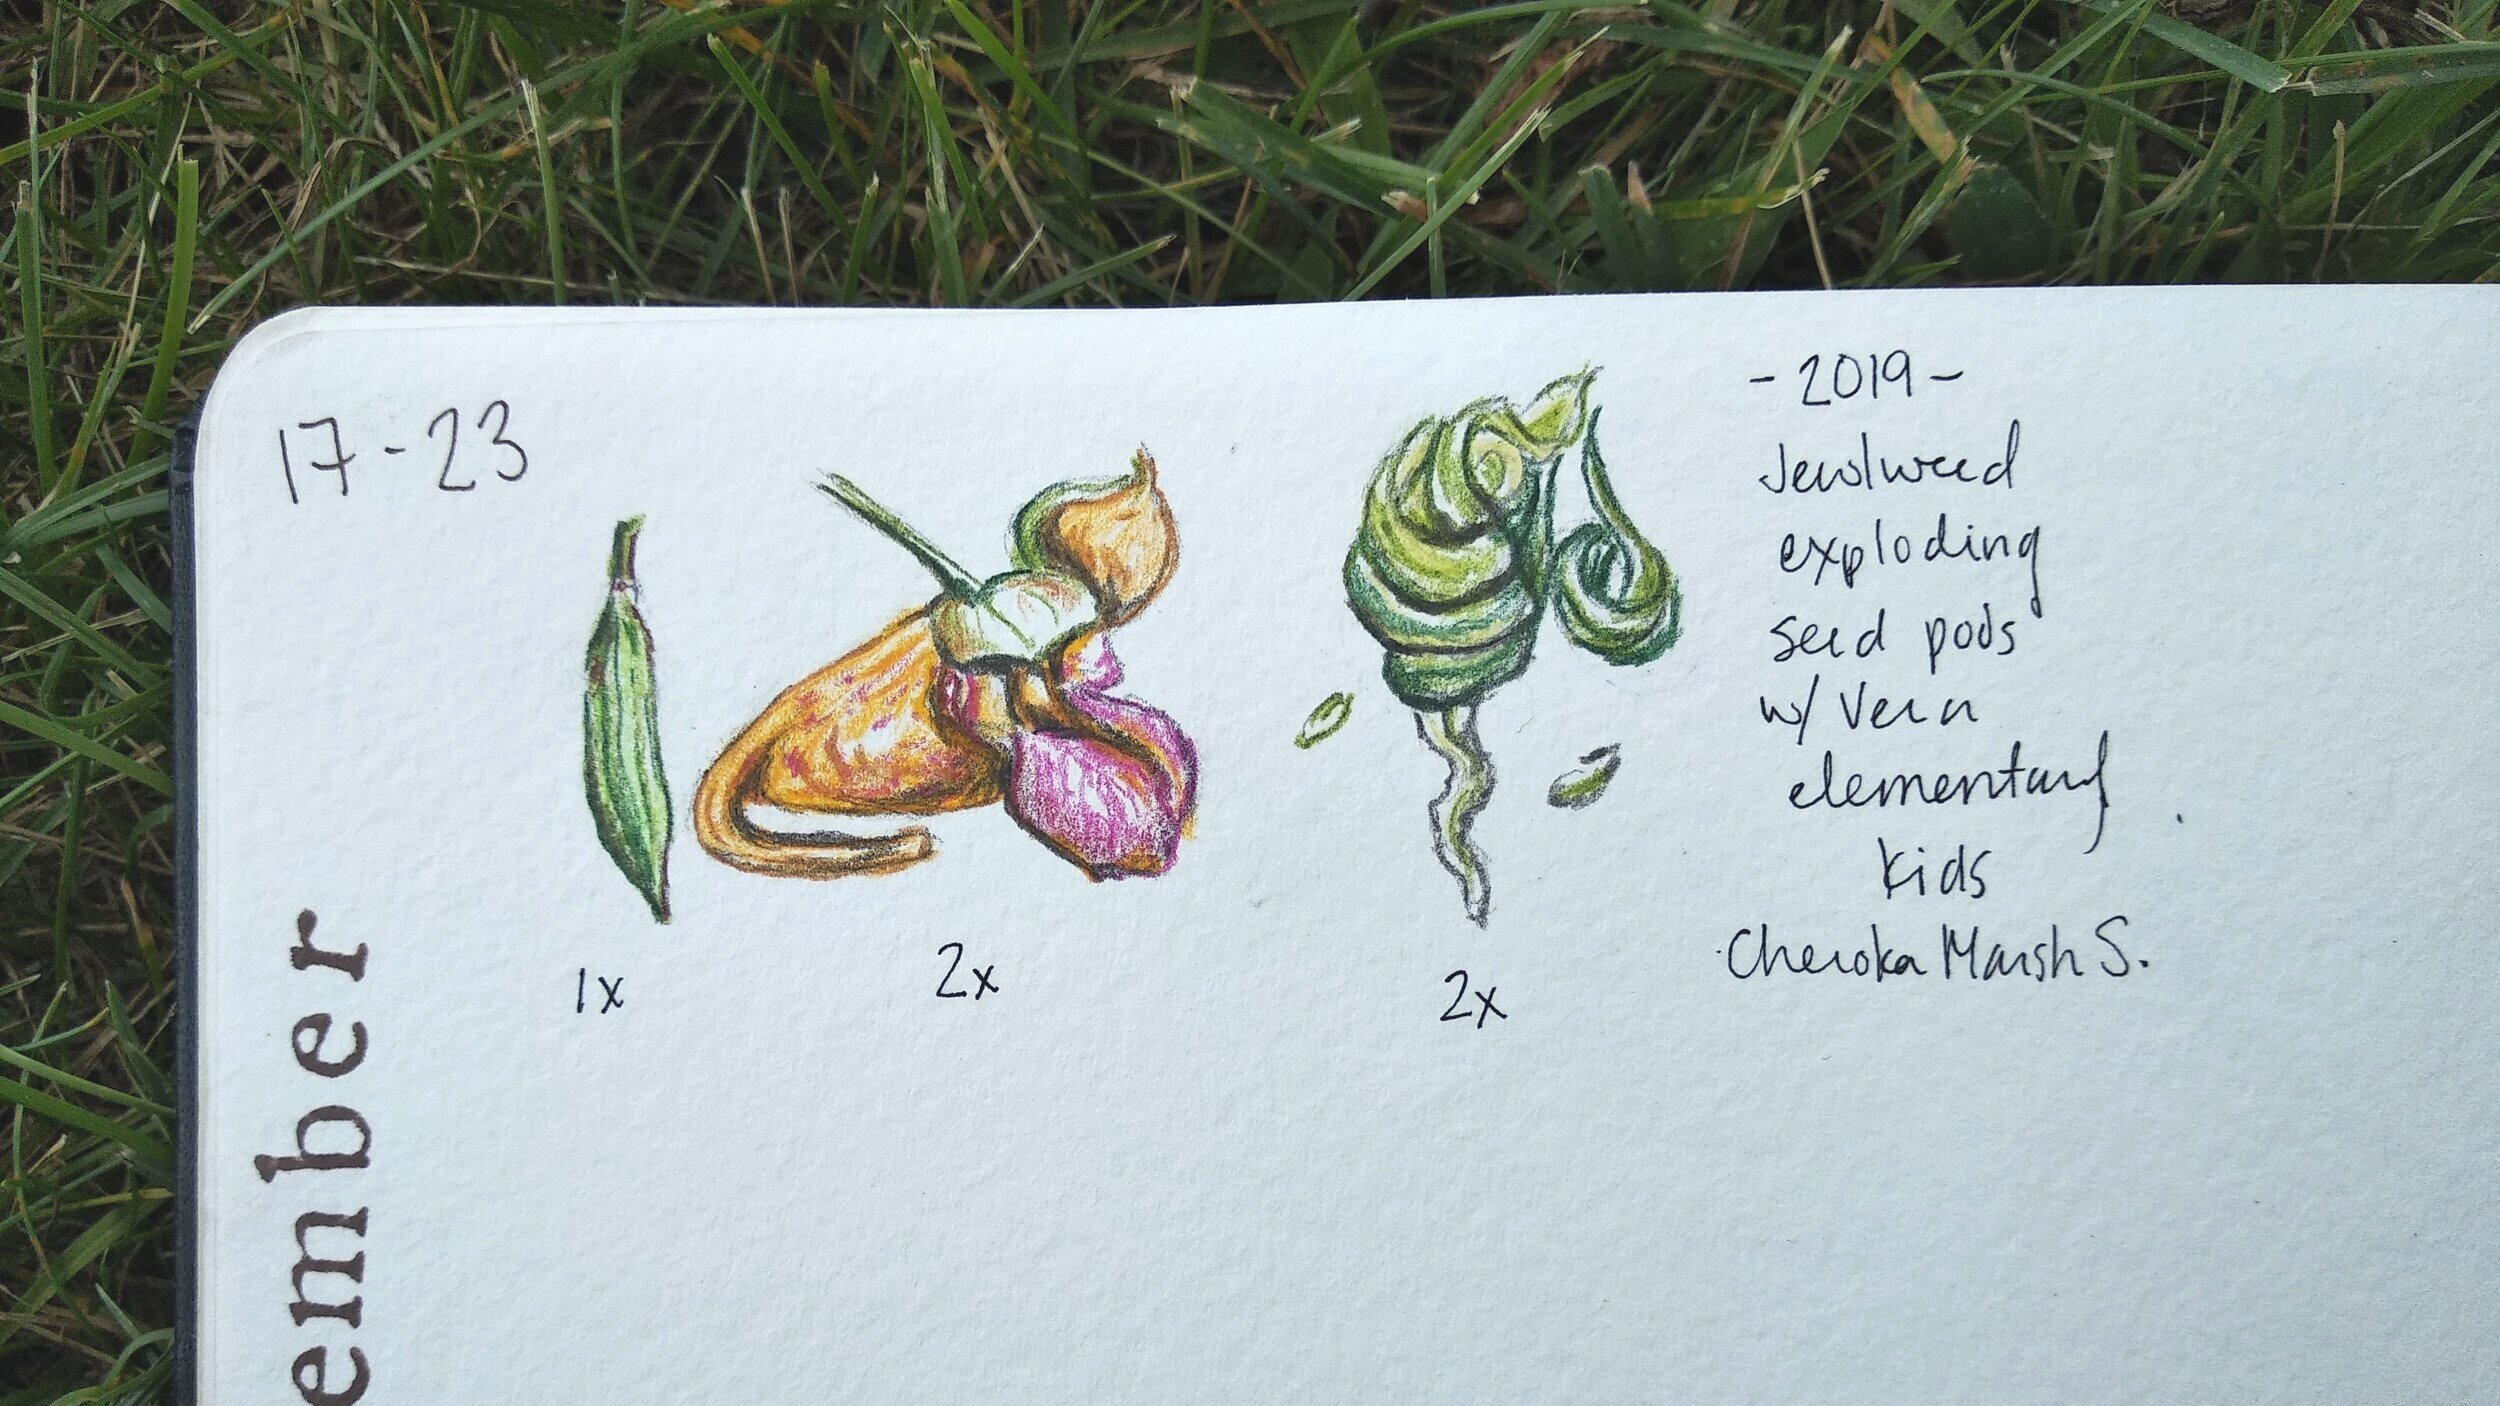
A perpetual journal entry from mid-September. Jewlweed is fun for adults and kids alike- those exploding pods don’t disappoint! Art by Carolyn Byers, @GreenSparrowArts.
Start a Phenology Journal
Phenology is the tracking of natural events as they change throughout the year. Grab a notebook or sketchbook and make weekly entries. Write and draw about what you experience outside, and as the year progresses you’ll have a record of how the seasons changed.
For more inspiration, check out artist and naturalist Lara Call Gastringer. Her Perpetual Journal is a spin on a Phenology Journal. Her sketchbook has one page for each week of the year, but she returns to those pages year after year. The drawings get layered over each other, creating a beautiful visual of the variation among years. Find out how to make your own here.

Take Advantage of Online Resources
There are so many online classes for field sketching and nature journaling. YouTube will forever be a wonderful place to learn new skills. Start searching topics like “field sketchbook”, “scientific illustration”, or “watercolor sketching techniques”. You’ll find lots of information!
If a class is more your pace, check out the free Natural History Illustration course offered online by the University of Newcastle in Australia. New courses begin regularly.
Cornell is currently offering their new Nature Journaling and Field Sketching online class. It comes with a hefty price-tag ($99), but their “sneak peek” videos will teach you a bit to get started. You can watch those and take your new skills outside immediately, or dive deeper into the class.
Online Exploration
New text about web cams for national parks? (make observations, nature journal, compare & contrast)
Classroom-Based Activities
New text and resources for classroom-based activities?
Banner photo: Spend some time getting to know the critters and plant life in your favorite outdoor area with these activities. Madison Audubon photo
