Starting native plant seeds in Wisconsin
Gardening with native plants is a wonderful way to enhance biodiversity in your yard. By starting seeds in the winter, your native plants can get a jump start on spring and you can grow lots of species for very little money! Once you have your seeds (purchased or collected locally), you’ll need a few supplies and a couple months of winter weather.
In a natural setting, native plants would flower in the spring, summer, or fall, then drop their seeds in fall. Those seeds sit on and in the ground for the winter, freezing and thawing as the temperatures change. Our goal is to mimic that activity using milk jugs.
Timing:
In southern Wisconsin, you can start native seeds anytime between mid-November to early-January. Since you need at least 6 weeks of consistently cold (below freezing) temperatures to activate germination, you may run out of sufficient winter weather if you start seeds after early January.
Methods:
You have two options for getting your seeds started.
Starting seeds in milk jugs indoors: Best for people who want to keep individual species separate and want them planted in particular spots.
Scattering seeds directly outdoors: Best for people who have a seed mix and/or want to fill a space with a mix of species.
We will describe how to go about both methods!
Method 1: Starting seeds indoors
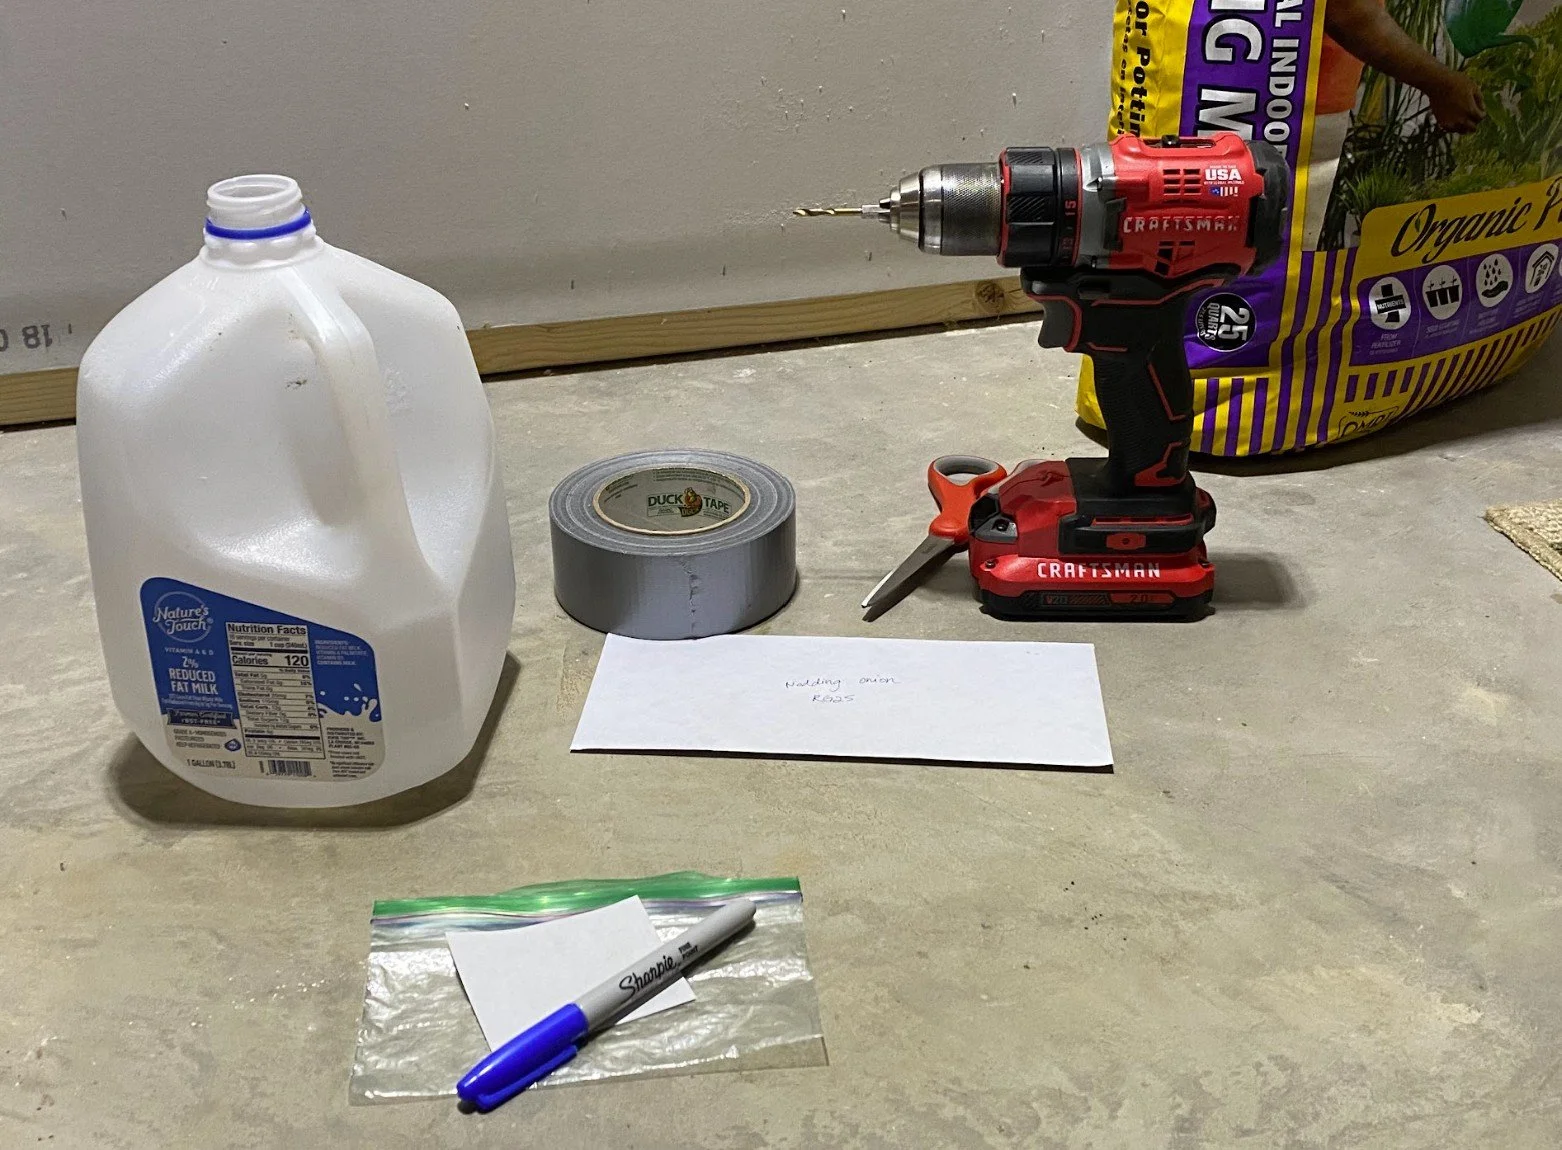
Example of supplies needed to start native seeds in winter (photo by Brenna Marsicek/SoWBA).
Gather your supplies:
One half-gallon or gallon milk/juice jug per species you want to grow (without the cap),
A drill and bit or scissors to punch holes in the bottom of the jugs,
Scissors,
Duct tape,
Ziplock sandwich bags, paper, and a permanent marker,
Potting or seed starting soil,
Native plant seeds,
A place to set the jugs outside for the winter where snow or rain will fall on them for at least 6 weeks
Process and steps:
We recommend you start seeds in milk jugs indoors in winter, as cold duct tape won’t easily adhere to cold milk jugs. Pick a spot that’s easy to clean up!
To start, drill or punch 4-5 holes in the bottom of each of your milk jugs. This is important for drainage.
Next, cut your milk jug in half, leaving one small section near the handle connected. Open the jug.
Fill the bottom half of the jug with potting soil, leaving about 1 inch of space below the edge.
Scatter seeds of one species in the milk jug, using your fingers to wiggle and scratch the soil to incorporate the seeds. They do not need to be deep (just a bit below the surface of the soil).
Gently water the soil if there is no snow outside (if there is snow, hold off on this step, and see Step 10).
Close the milk jug, and use duct tape to tape the jug shut. Do not put the cap back on the jug.
On a small piece of paper or index card, write the name of the species of seeds you just planted. Put it inside a ziplock bag, zip it shut and fold it in half to prevent water from seeping in through the zipper and getting the paper wet.
Put the side of the paper you wrote on facing the jug (this helps prevent the sun from fading the text), and tape the baggie to the jug on top and bottom.
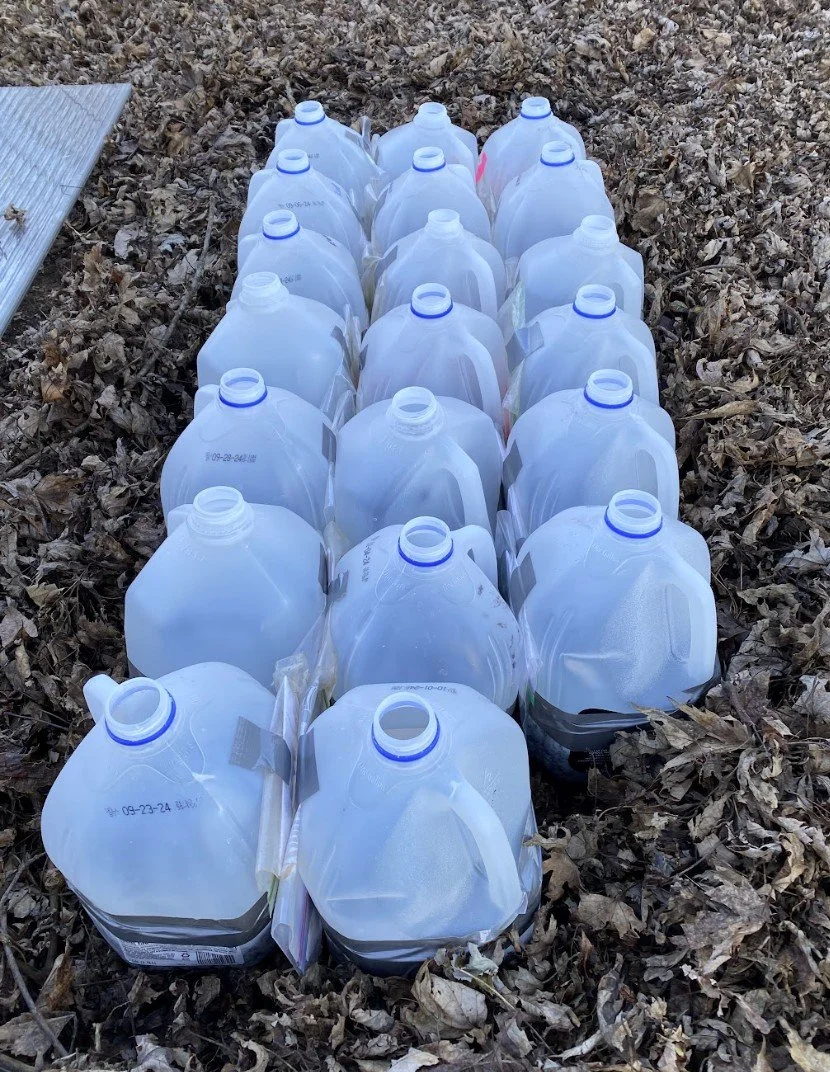
Put the jug in a spot that will allow sun, rain, and snow to access it. If you position your milk jugs so the ziplock baggies with the labels are facing each other, it’ll further reduce the chances that the sun will fade the label.
If there’s snow on the ground, pour snow in through the open cap so the soil is covered with a few inches of snow. If not, carefully water them and let them sit until snow falls!
The seeds are planted. Now what?
Then, you leave them alone until spring! If it’s a dry winter, you can water the milk jugs now and again. Keep an eye on them when the weather gets warm—you will need to remove the tape and open the milk jugs in late April or May to prevent the seedlings from getting overly hot, wilted, or squished together. Keep them watered so the soil is moist but not soggy. Once the plants are about 6 inches tall, transplant them to your preferred location and continue watering them consistently for one full year after planting.
Planted milk jugs, positioned so labels in baggies face each other and reduce sun fade (photo by Brenna Marsicek).
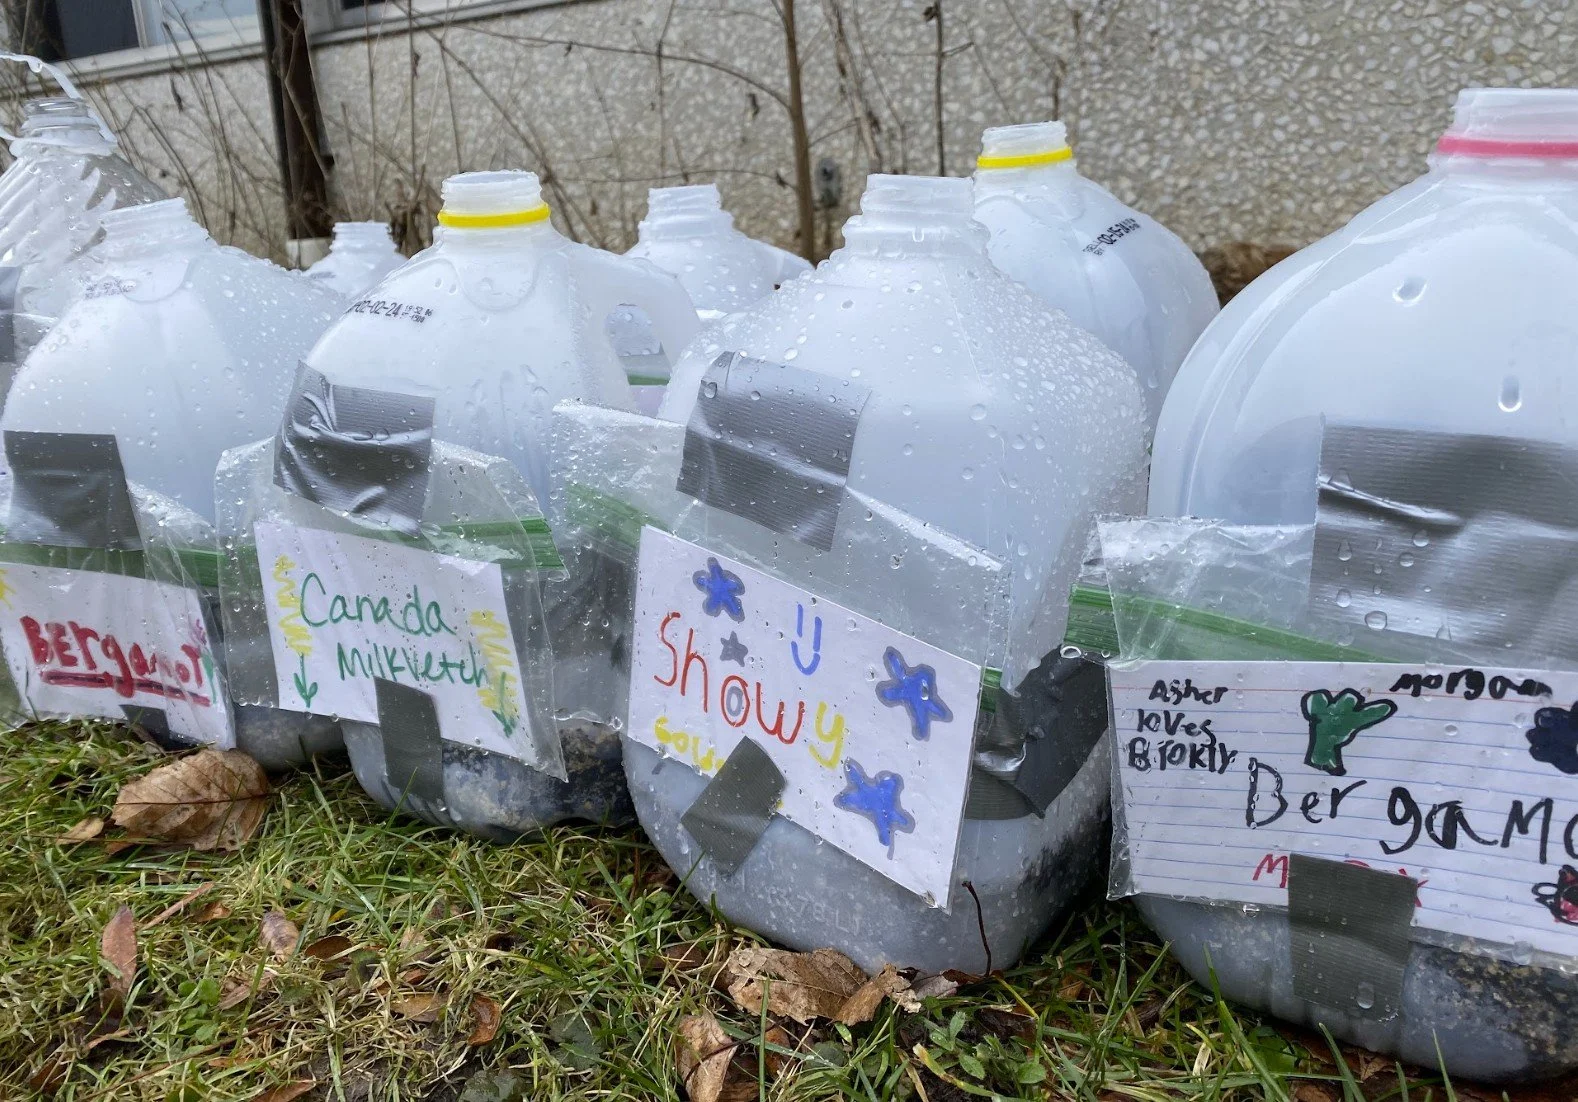
Third grade students at Elvehjem Elementary School in Madison started seeds for their native plant pollinator garden in 2023! (Photo by Brenna Marsicek)
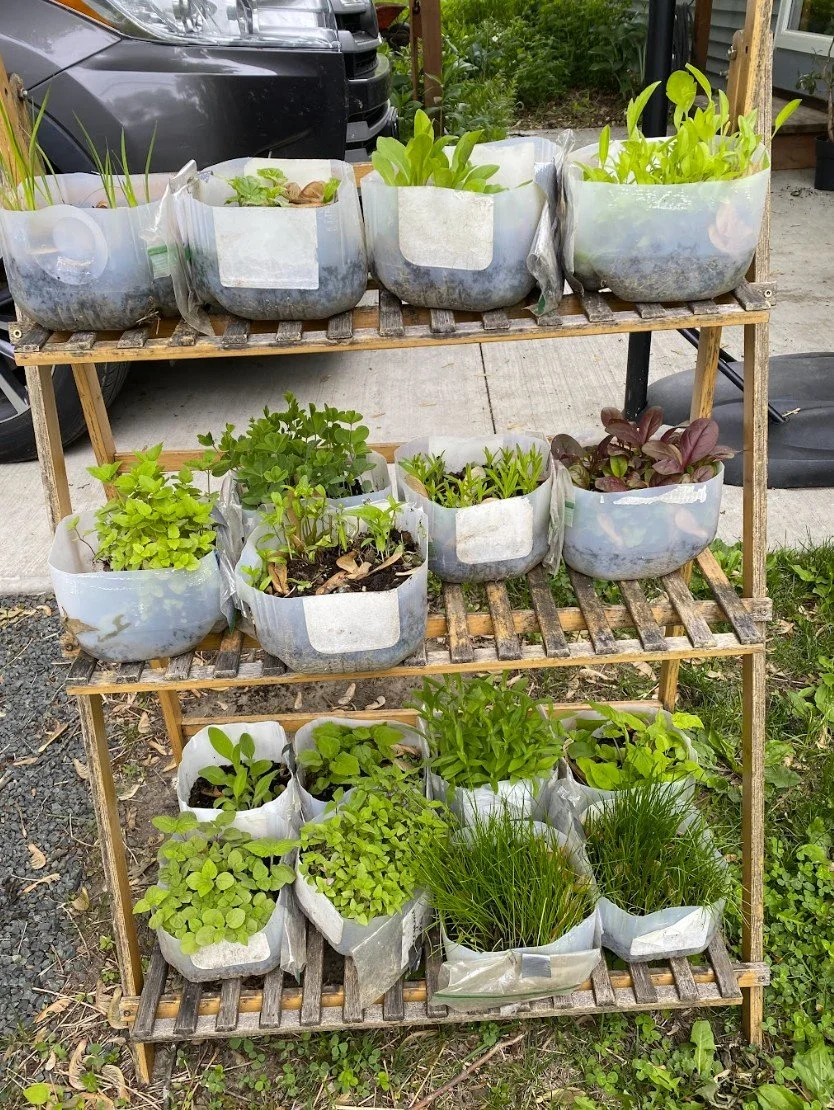
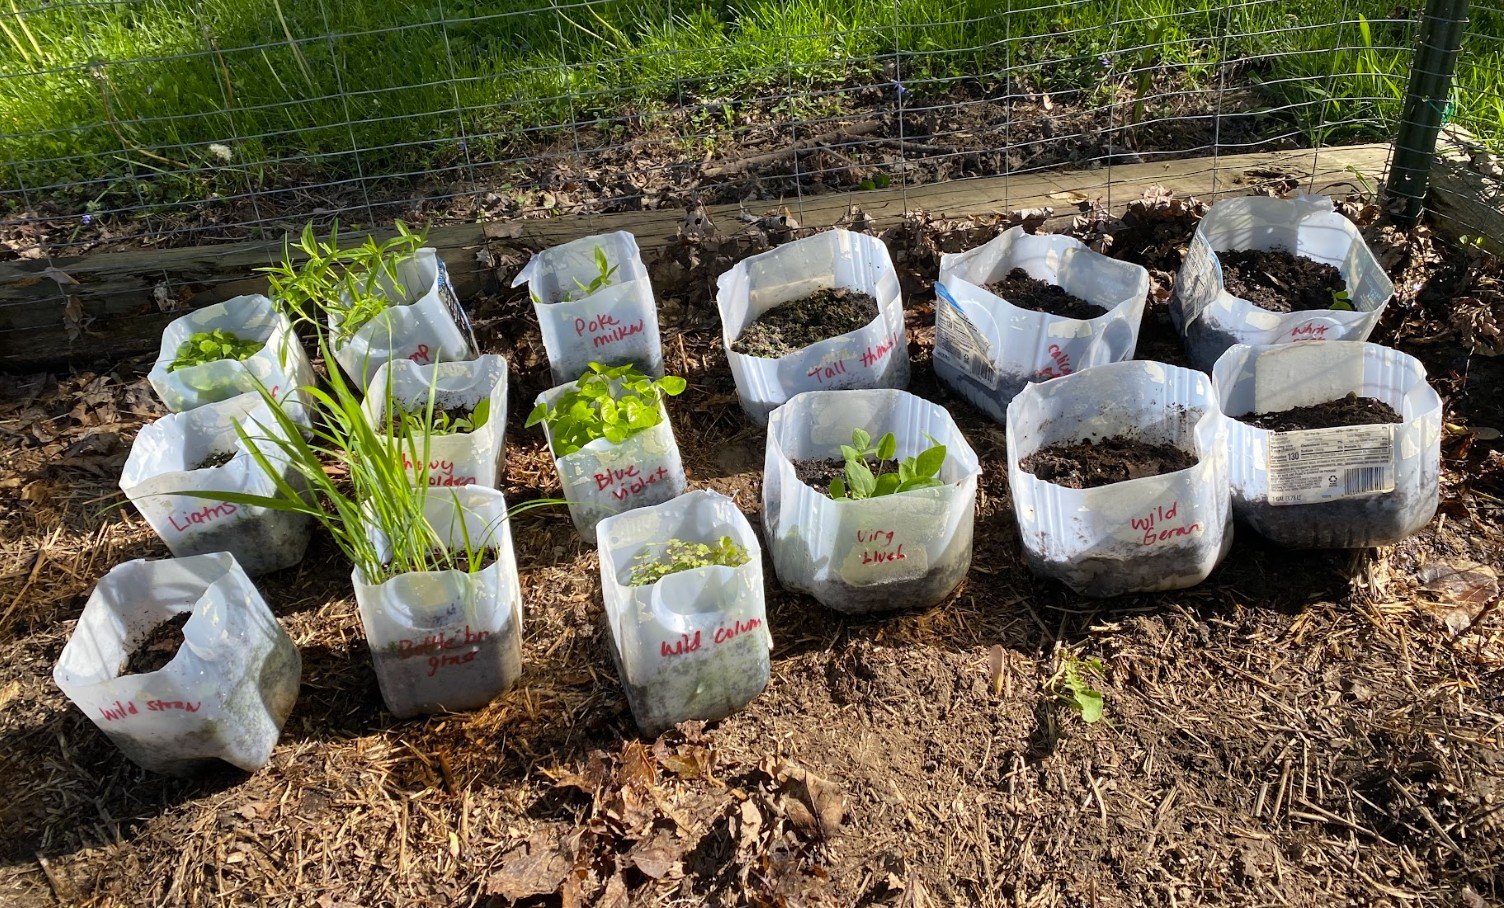
Native plants growing in their milk jugs in May! (Photo by Brenna Marsicek)
Method 2: Scattering your seeds directly into the soil
Native plant seeds can be scattered in an area you want them to grow in fall or winter, so the seeds have the time to naturally cold stratify. Scattering in spring and summer is fine too, but animals may eat the seeds before they germinate, since they won’t germinate until after winter.

